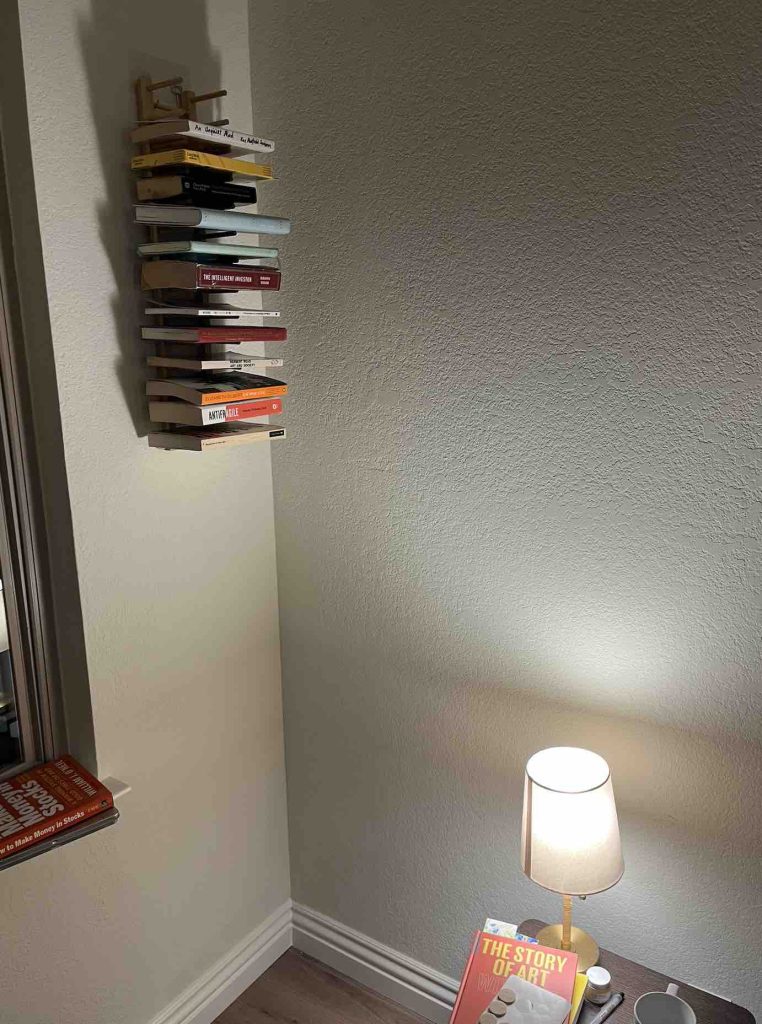
This post shows you how to DIY your own cheap hanging bookshelf perfect for small spaces.
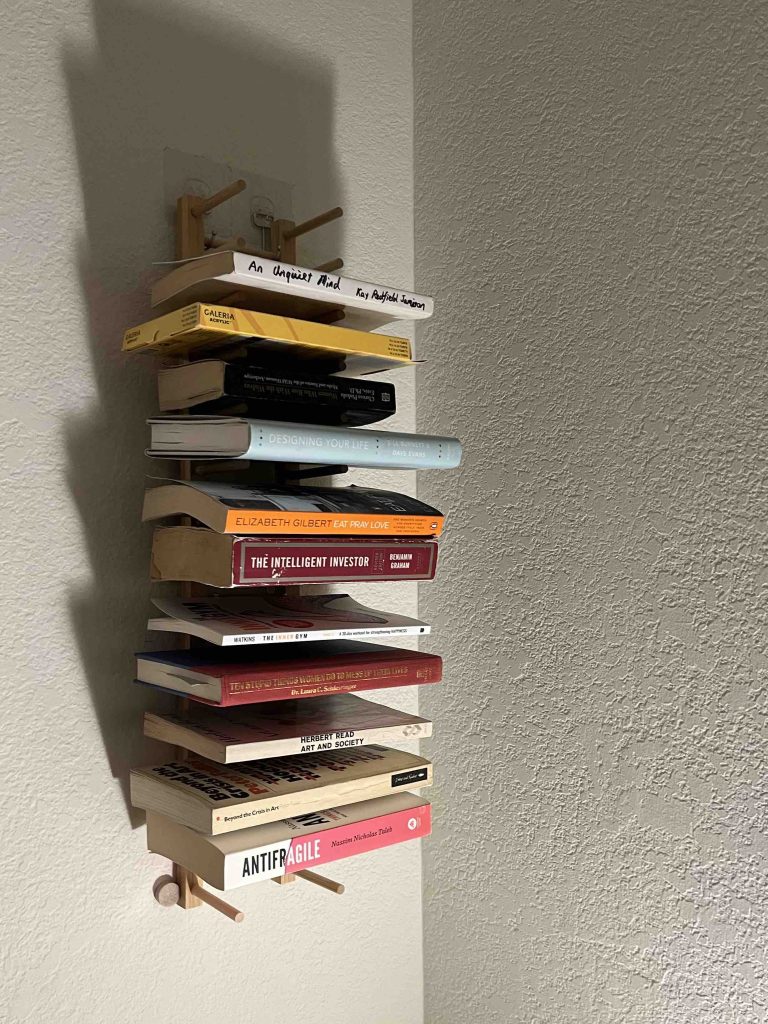
Vertical standing bookshelves have become incredibly trendy in the past few years. If you’re anything like me, the Design Within Reach Story bookshelf has been living rent free in your mind ever since you first saw it. However, $300 just sounds like a bit too much to fork out for a bookshelf (in this economy at least 🥴 ).
Don’t worry – I think I might have found the perfect solution: a cheap DIY bookshelf you can make for less than $20.
This hanging bookshelf mimics the look of the vertical standing bookshelf, while occupying less space (in fact, you need zero floor space since it hangs onto your wall). And don’t worry renters – you don’t need to drill into the wall at all for this project! In fact, you won’t need any mechanical tools at all to build this shelf. I’m not a particularly “handy” person, but I was able to build this myself with no issues.
I was actually inspired to build this shelf by this viral Tiktok video:
@grillodesigns I got so many questions about this bookshelf when I shared my mini bedroom makeover over the weekend, that I thought it might be a good idea to share this tutorial again. It’s literally just a wooden dish rack – hung vertically. Two things to note though : – don’t use the IKEA osbit ones, they’re too short and the books will just slip out (learnt this first hand) – the self adhesive strips work best on non porous surfaces which means they could peel off paint on some walls (it’s not happened to me yet but I’ve heard stories). I’d advise removing with a hair dryer if you’re concerned this could happen. Alternatively you could just use screw in cup hooks if you don’t mind making holes. Will you try this in your bedroom? #booktok #diyhacks #shelf #bedroomshelf #bedsidetable #bedroomideas ♬ original sound – Grillodesigns
However, I needed to tweak the steps from that video significantly before I could get the desired result. Before figuring things out, this happened:
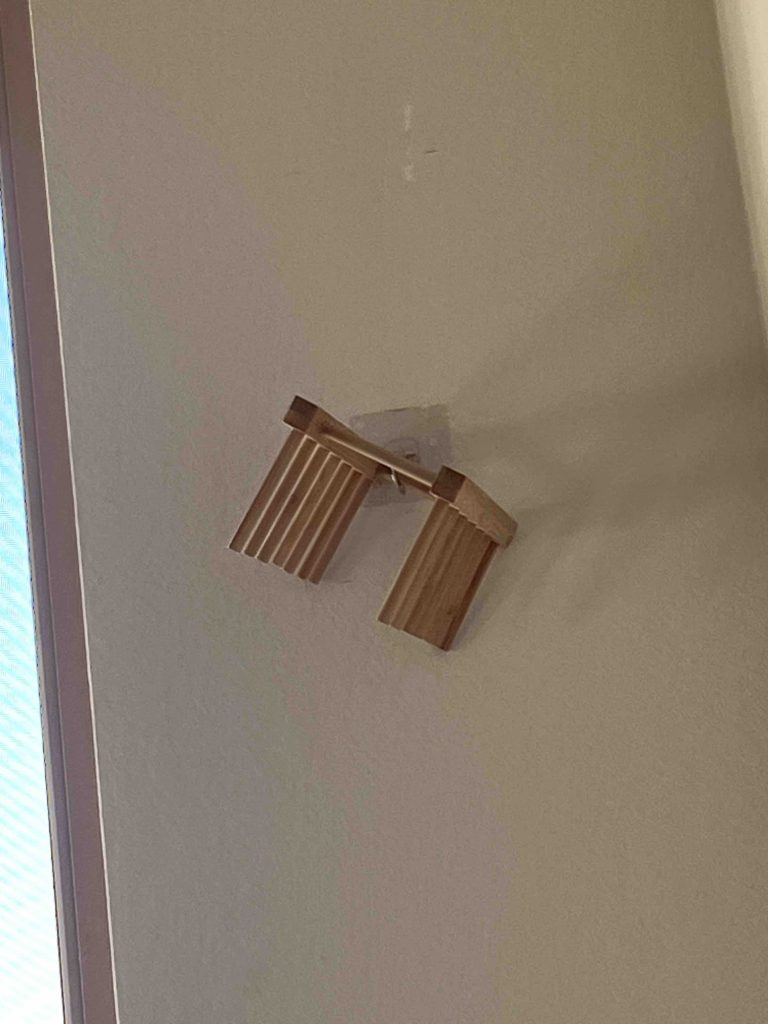
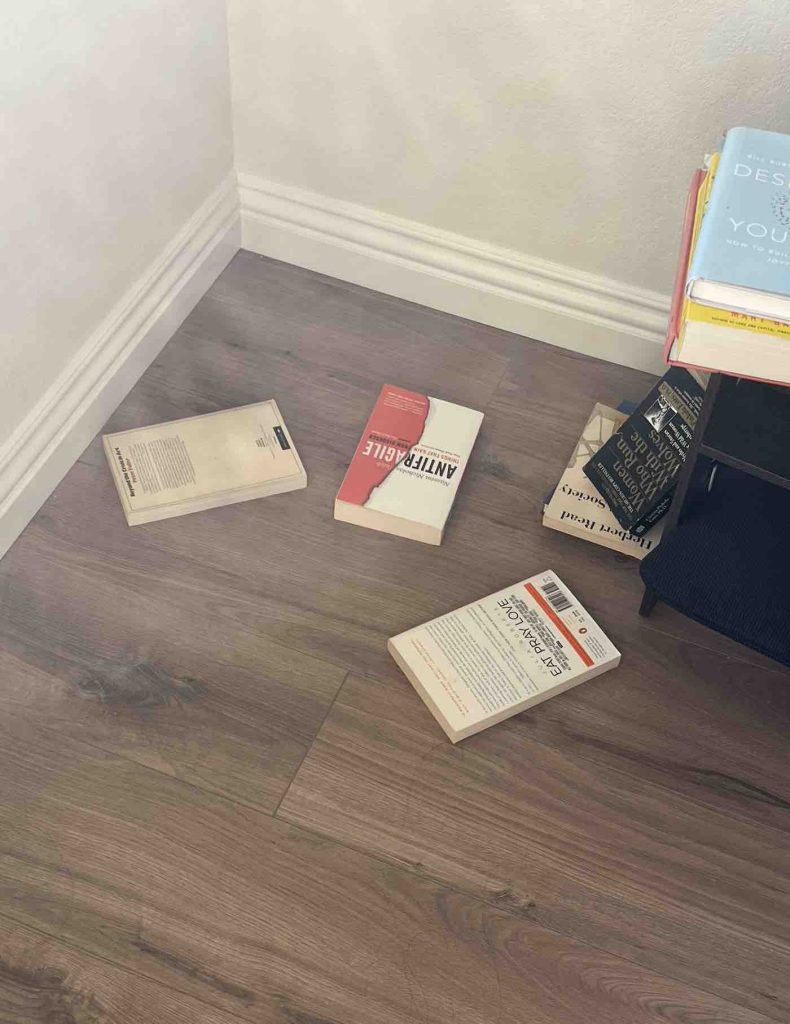
Yeah, not ideal. However, after experimenting a bit I found a method that is foolproof and secure. The secret lies in using 2 hooks to hang the top of the dish rack from, and NONE at the bottom. This helps the hanging bookshelf stay balanced and stable. Instead, use felt furniture pads at the bottom to secure the dish rack in place.

Follow the instructions below carefully to save yourself from any headache!
Time Needed:
60 minutes
Supplies You Need:
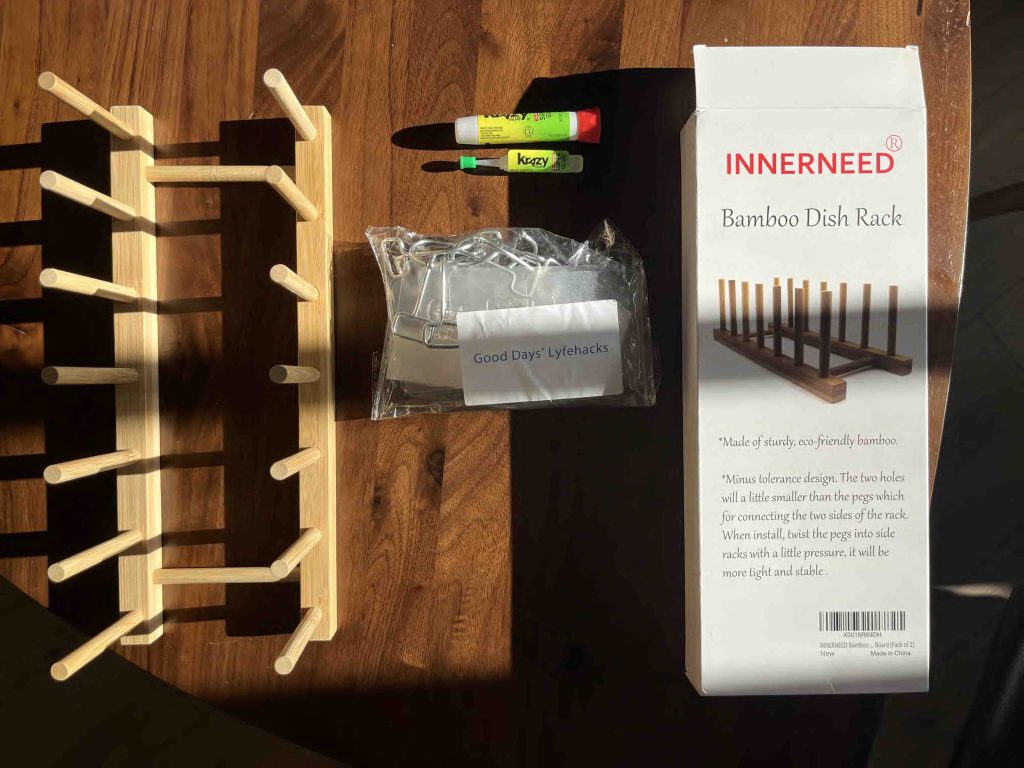
1. Sticky hooks
I used these Good Days Lyfehacks Ultra Strong Adhesive Hooks Pack of 10 that are selling for $3.96 on Amazon at the time of writing this. They can carry up to 22 lbs.
2. Bamboo dish racks (pack of 2)
I used this pack of 2 INNERNEED Bamboo Wooden Plate Dish Rack Holder selling for $8.96 on Amazon at the time of writing this.
3. Superglue
I used some Krazy Glue I had lying around, but this Loctite Super Glue selling for $3.64 on Amazon should work just as well.
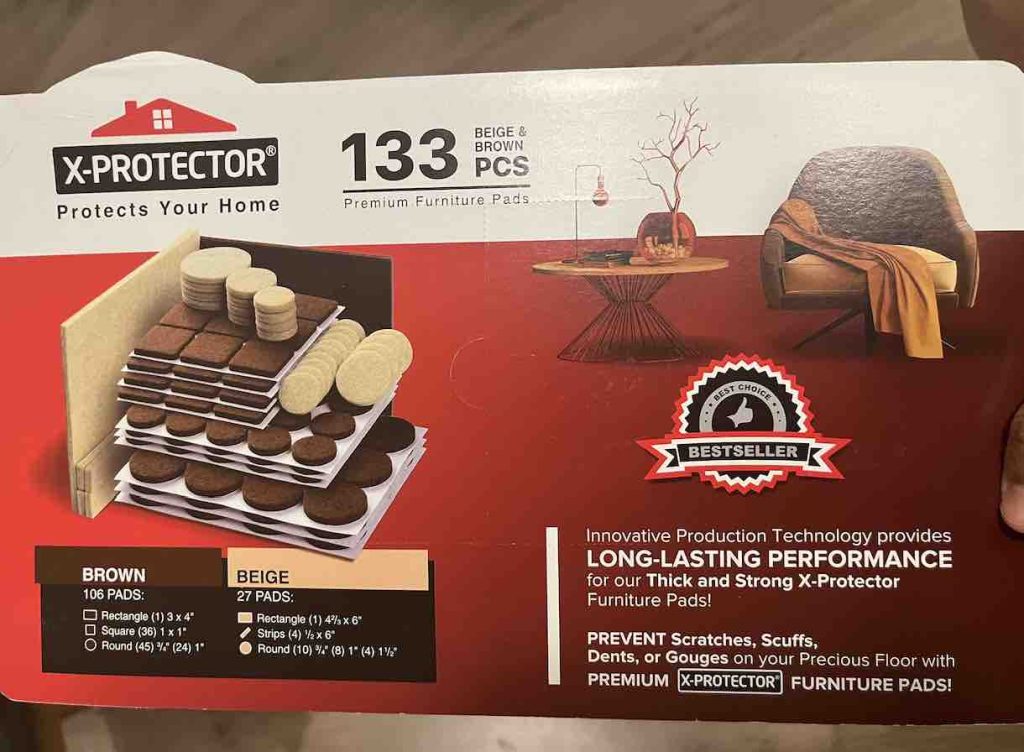
4. Felt furniture pad stickers
I already had a large jumbo pack of furniture pads lying around, but this 8 pack from Amazon retailing for $3.45 should work perfectly.
5. Pen
Any ball point or gel pen would do.
Total Cost:
3.96 + 8.96 + 3.64 + 2.79 = $19.35!
So it’s definitely possible to buy all the supplies you need for this cheap DIY bookshelf for less than $20! Of course prices are dynamic on Amazon, so you can look on other retailers like Target and Walmart too, which might have more competitive prices occasionally.
Cheap DIY Bookshelf Instructions:
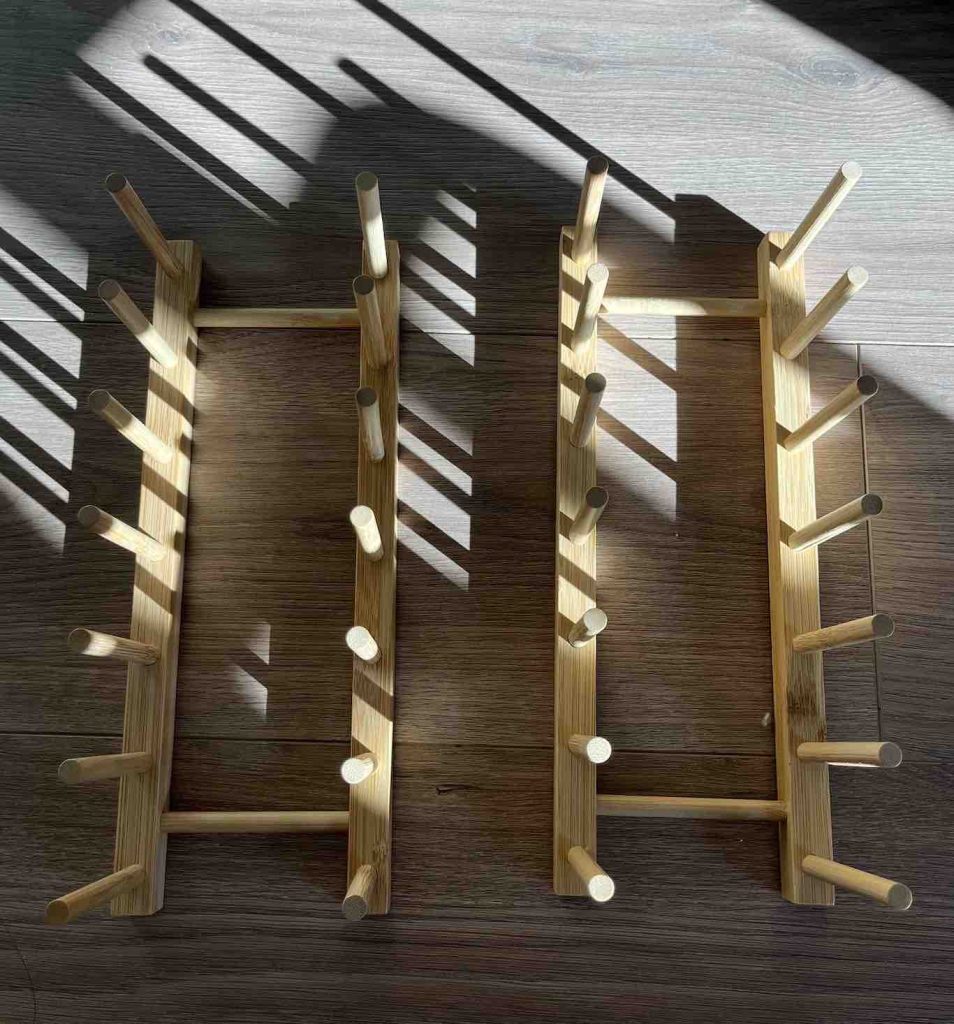
1. Assemble the bamboo dish racks with super glue.
Follow the instructions from the bamboo dish rack package to assemble them. It should be pretty straightforward.
My bamboo dish rack package didn’t mention the use of any adhesive, but I added superglue to the ends of the sticks in between the two sides of the rack for extra strength.
If you want a long vertical bookshelf the same size as mine pictured above, you’ll need to assemble both dish racks in the package (2 total).
2. Mark out where you want to hang the shelf on your wall with pen.
Now for the fun part! Decide where you want to place your bookshelf on the wall. I chose to put mine next to my bedside table. Ideally, you should put it in a location that is easily accessible and visible but not in the way of your regular day to day movements.
Then, affix two hooks to their hook holders, place the dish racks onto the hooks, and mark out the outline of the hook holders on the wall using your pen. Make sure the hook holders are parallel such that the dish rack would hang in a stable, upright way.
This might be a little awkward and hard to do with just two hands, so ask for someone to help you out if need be! I managed to somehow get it done on my own though so you probably can too 😅.
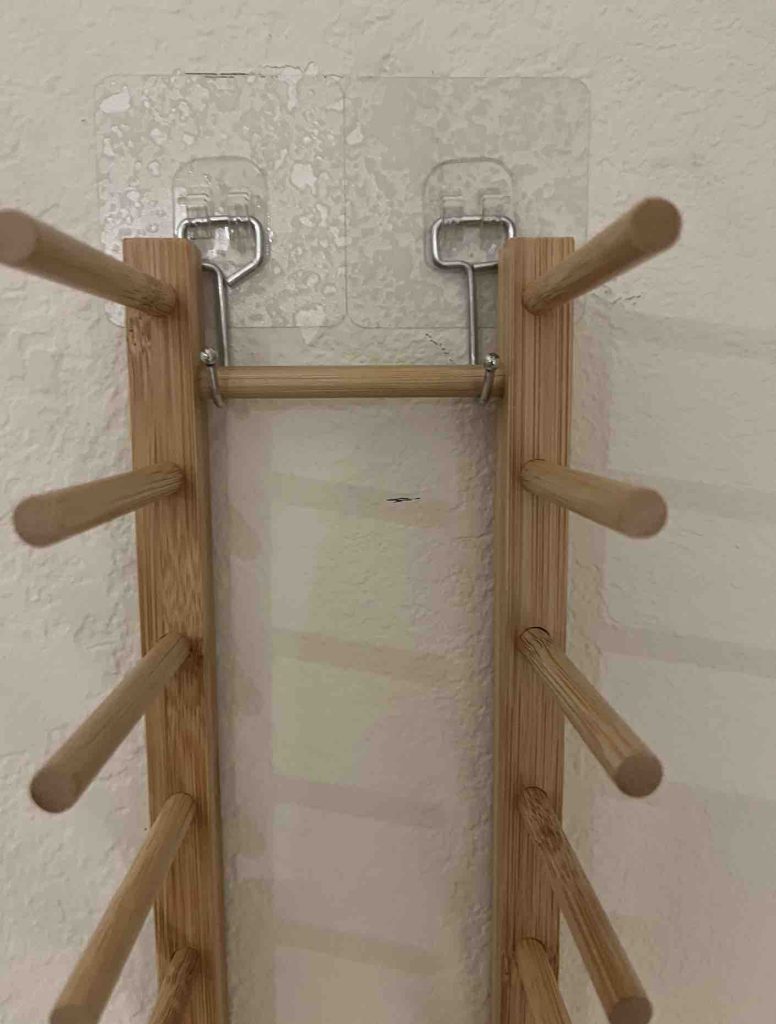
3. Stick the hooks on. PRESS IT HARD.
Remove the sticker plastic from the sticky hook holder and place them onto the wall based on your pen markings. Make sure to press them on HARD!!! I used the metal hooks to really get into the nooks and crannies and press every part of the sticker onto the wall.
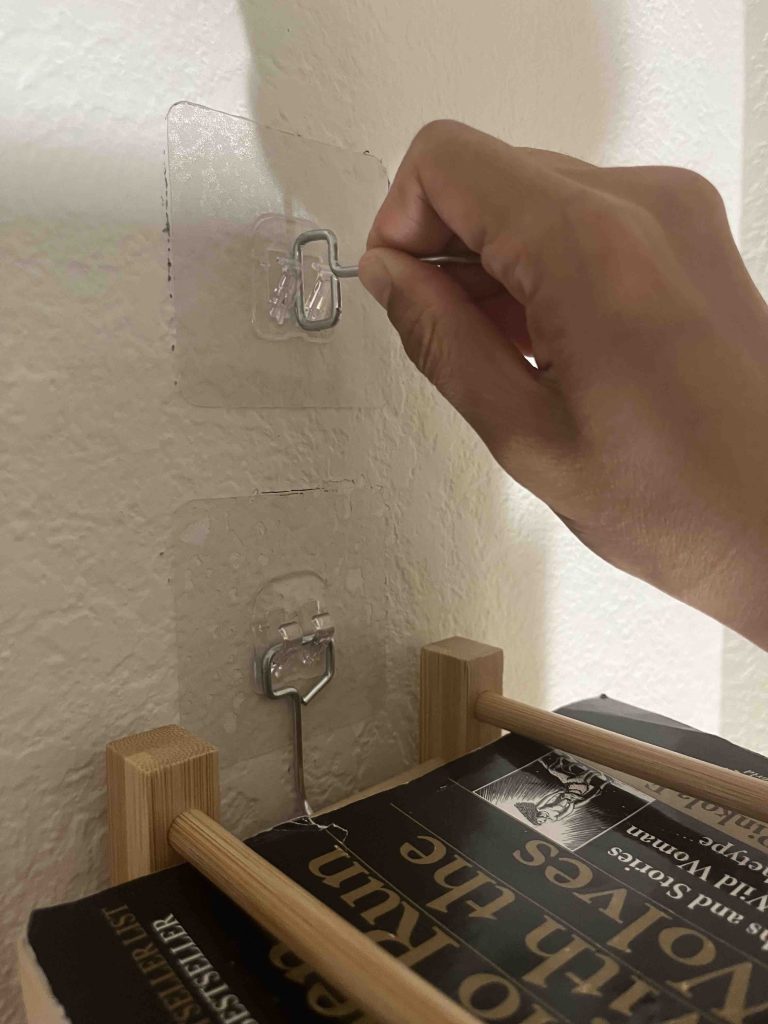
The hook holder can only support the full weight of your bookshelf if quite literally EVERY part of its sticky backing makes contact with your wall. This is especially important if you have textured drywall like I do in my rental apartment. However, you can still get by fine with textured walls if you just press really hard on every part of the sticky hook holder!
4. Attach the hooks onto the hook holders. Then hang the dish rack onto the hooks.
Put your hooks onto the hook holders that are now affix to the wall, and hang your dish rack onto the two hooks.
Since there are two hooks holding the dish rack in place, it should be somewhat stable, but it’s ok if the bottom part is still a bit wobbly. Put a book onto the rack to test it out, and manually put the rack in an upright position such that the book doesn’t slide around.
Use your pen to mark the location of the sides of the dish rack near the bottom. We will use these marks in the next steps to make your bookshelf stable.
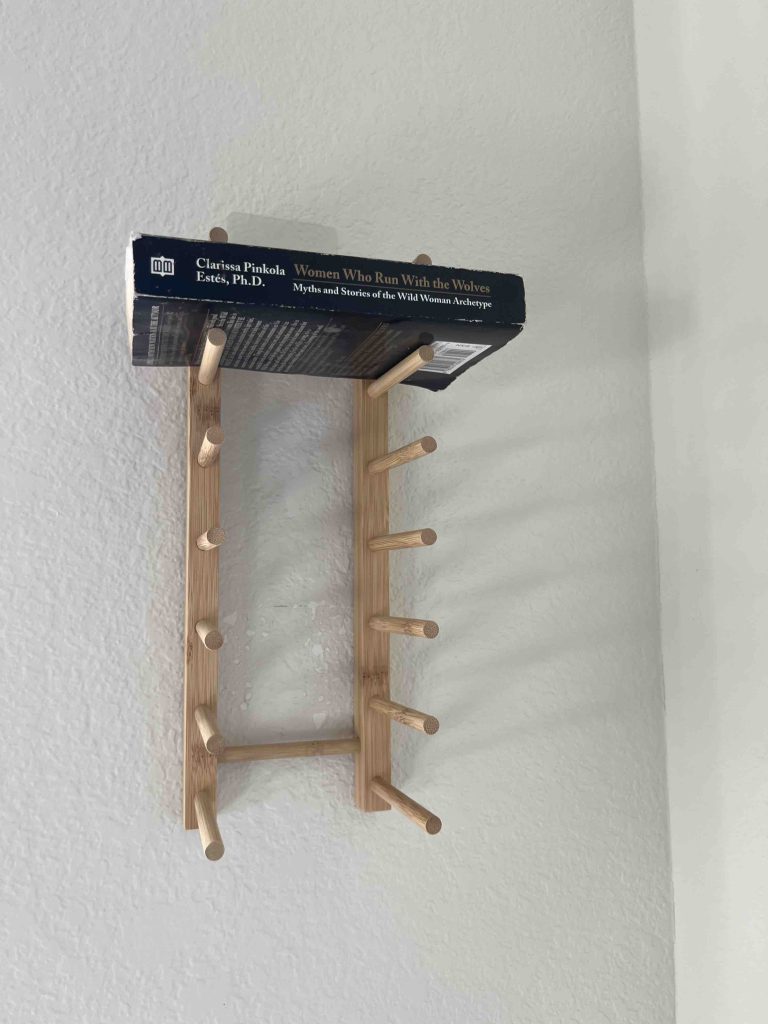
5. Add the felt stickers underneath the lower parts of the dish rack to make it parallel with the wall.
You might notice that some thinner books might fall out of your bookshelf, because it is tilted slightly forwards and not entirely parallel with the wall.
We can fix this with the felt furniture stickers!
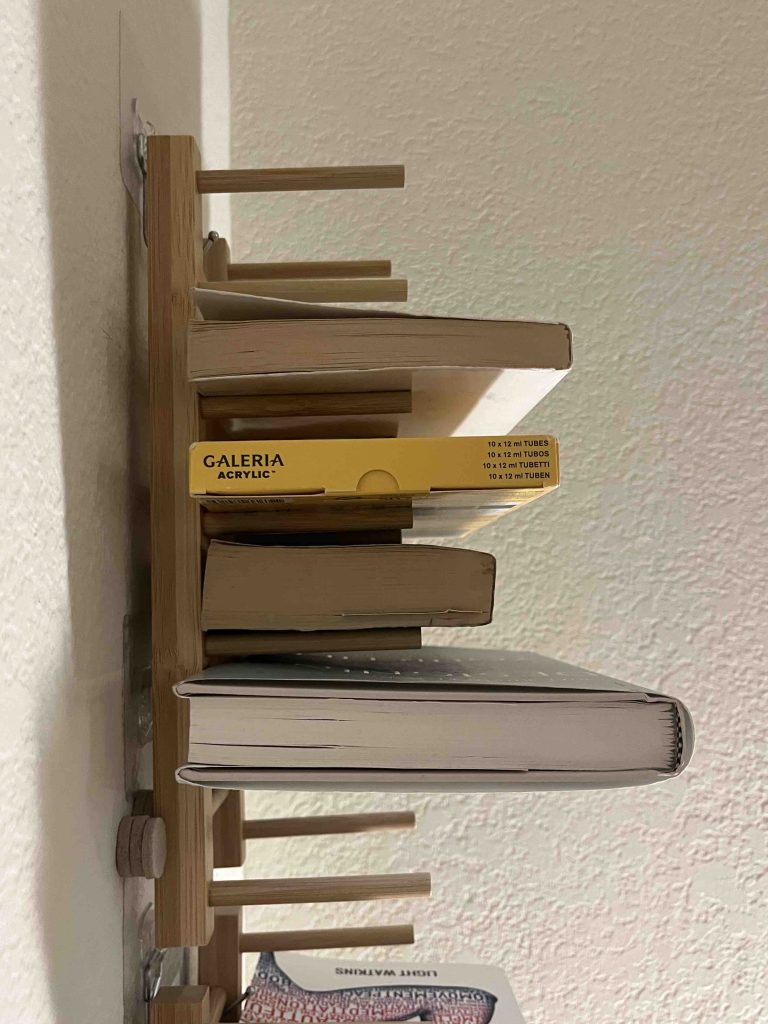
Place some small stickers underneath the lower ends of the two main sticks of the dish rack, on each side. You might need to stack the felt stickers on top of each other to get the necessary thickness. I had to use 2 small, round felt stickers on each side.
The desired result is for the padding to bolster the bottom part of the dishrack such that it is completely upright and parallel with the wall. Now, when you put books onto the rack, they should rest securely in place.
5. Add felt stickers on the sides of the bottom part of the dish rack to secure it in place.
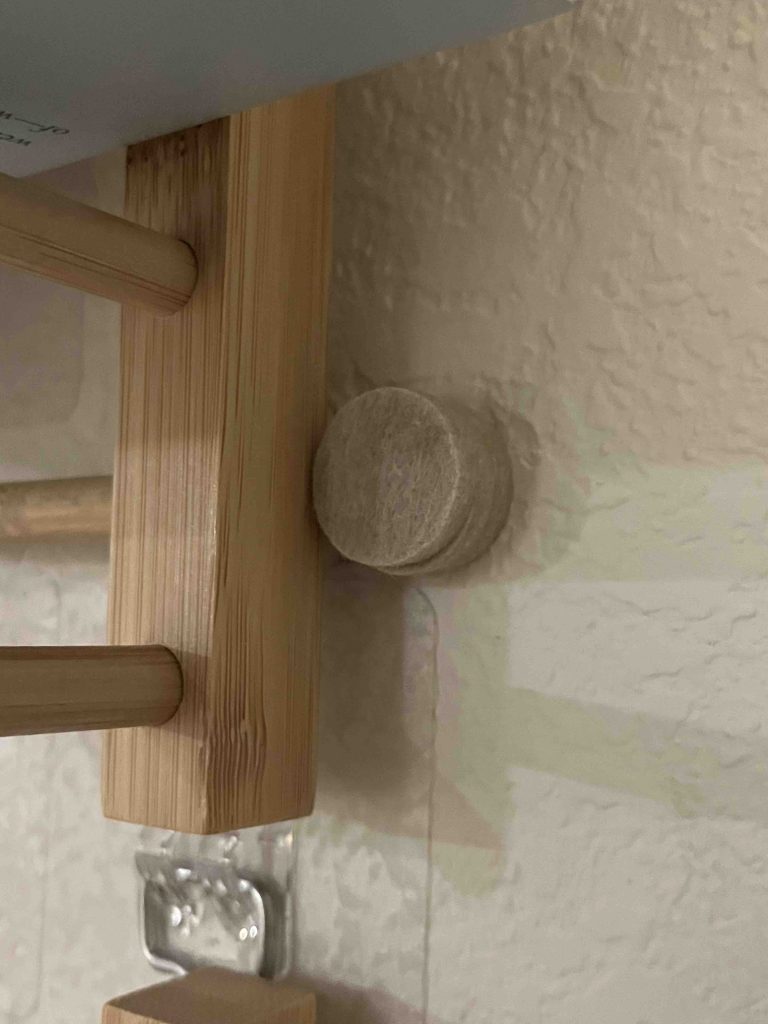
To make sure your dish rack doesn’t slide from side to side and rests securely in place, you need to place some felt stickers next to the two main wood sticks to hold it in place. You will probably need to stack more than one sticker on top of each other to get the necessary thickness. I used 3 felt stickers stuck on top of each other.
Make sure the fit is snug with not much room for the dish rack to move around.
6. Add your books!
That’s it! Now all you need to do is add your books. If you want to get the longer bookshelf, you can simply repeat the process with more dish racks above or below your original one. Place them close together to make them look like just one long continuous shelf.
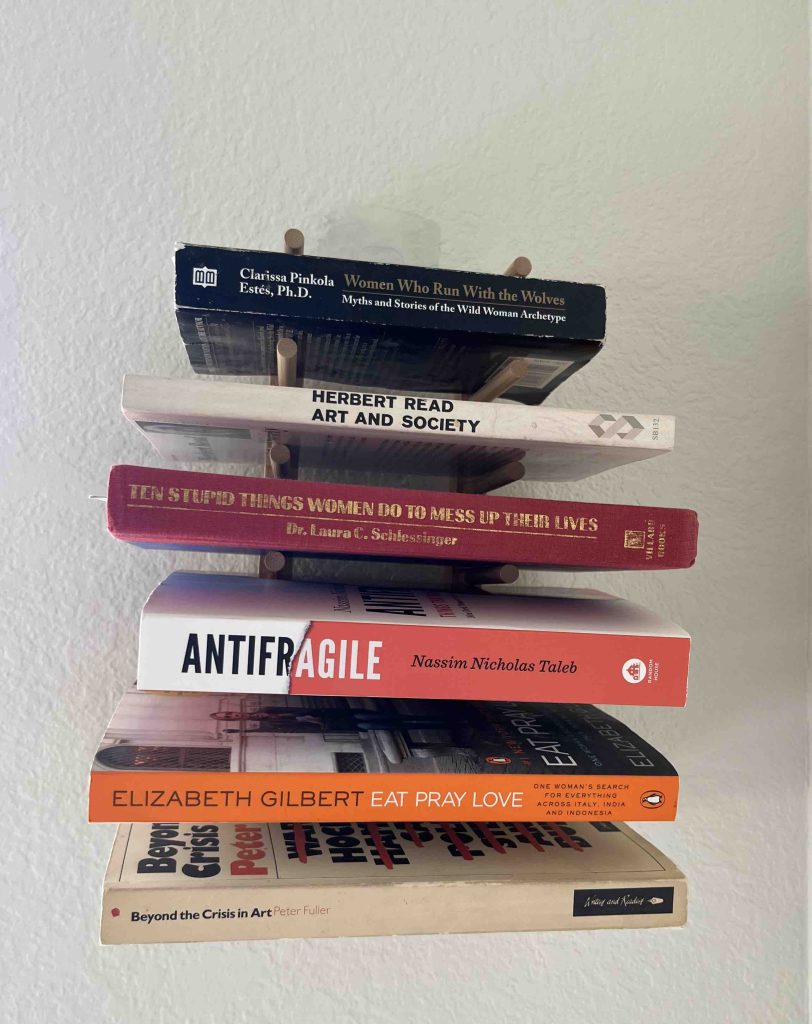
There you have it – a cheap DIY bookshelf you can put on any open wall in your home, for less than the price of a hardcover book. This bookshelf looks great next to an armchair in a reading nook, or beside a desk, or by your bedside. Turn your shelf into a true statement piece by arranging your books monochromatically, or in a color gradient.
Be warned – this shelf is a huge compliment getter with guests! They will be asking you left and right where you got this cool, standout piece. Good thing is, you can refer them to this article to help them create their own cool cheap DIY bookshelf at home 😊. Happy DIY-ing!
This post contains affiliate links. I may earn a small commission, at no extra cost to you.
